
It is such an unique,very sweet and hand crafted pattern that I am loathe to call my post a tutorial-more a 'this is how I made it'.
As always my tutorials are to be used with the pattern instructions not to replace them.

Transfer the split marking.
I basted mine in-less chance of it rubbing off.
It is quite hard to see in the photo but the thread end is visible on the silver cover.

Do the same with the front dress piece.
You may wish to mark the front and back of your fabric to prevent confusion.

Sew the sleeves to the front and back dress pieces and neaten seams.
Next time I shall clip the curve BEFORE neatening the sleeve-this seam really needs clipping!

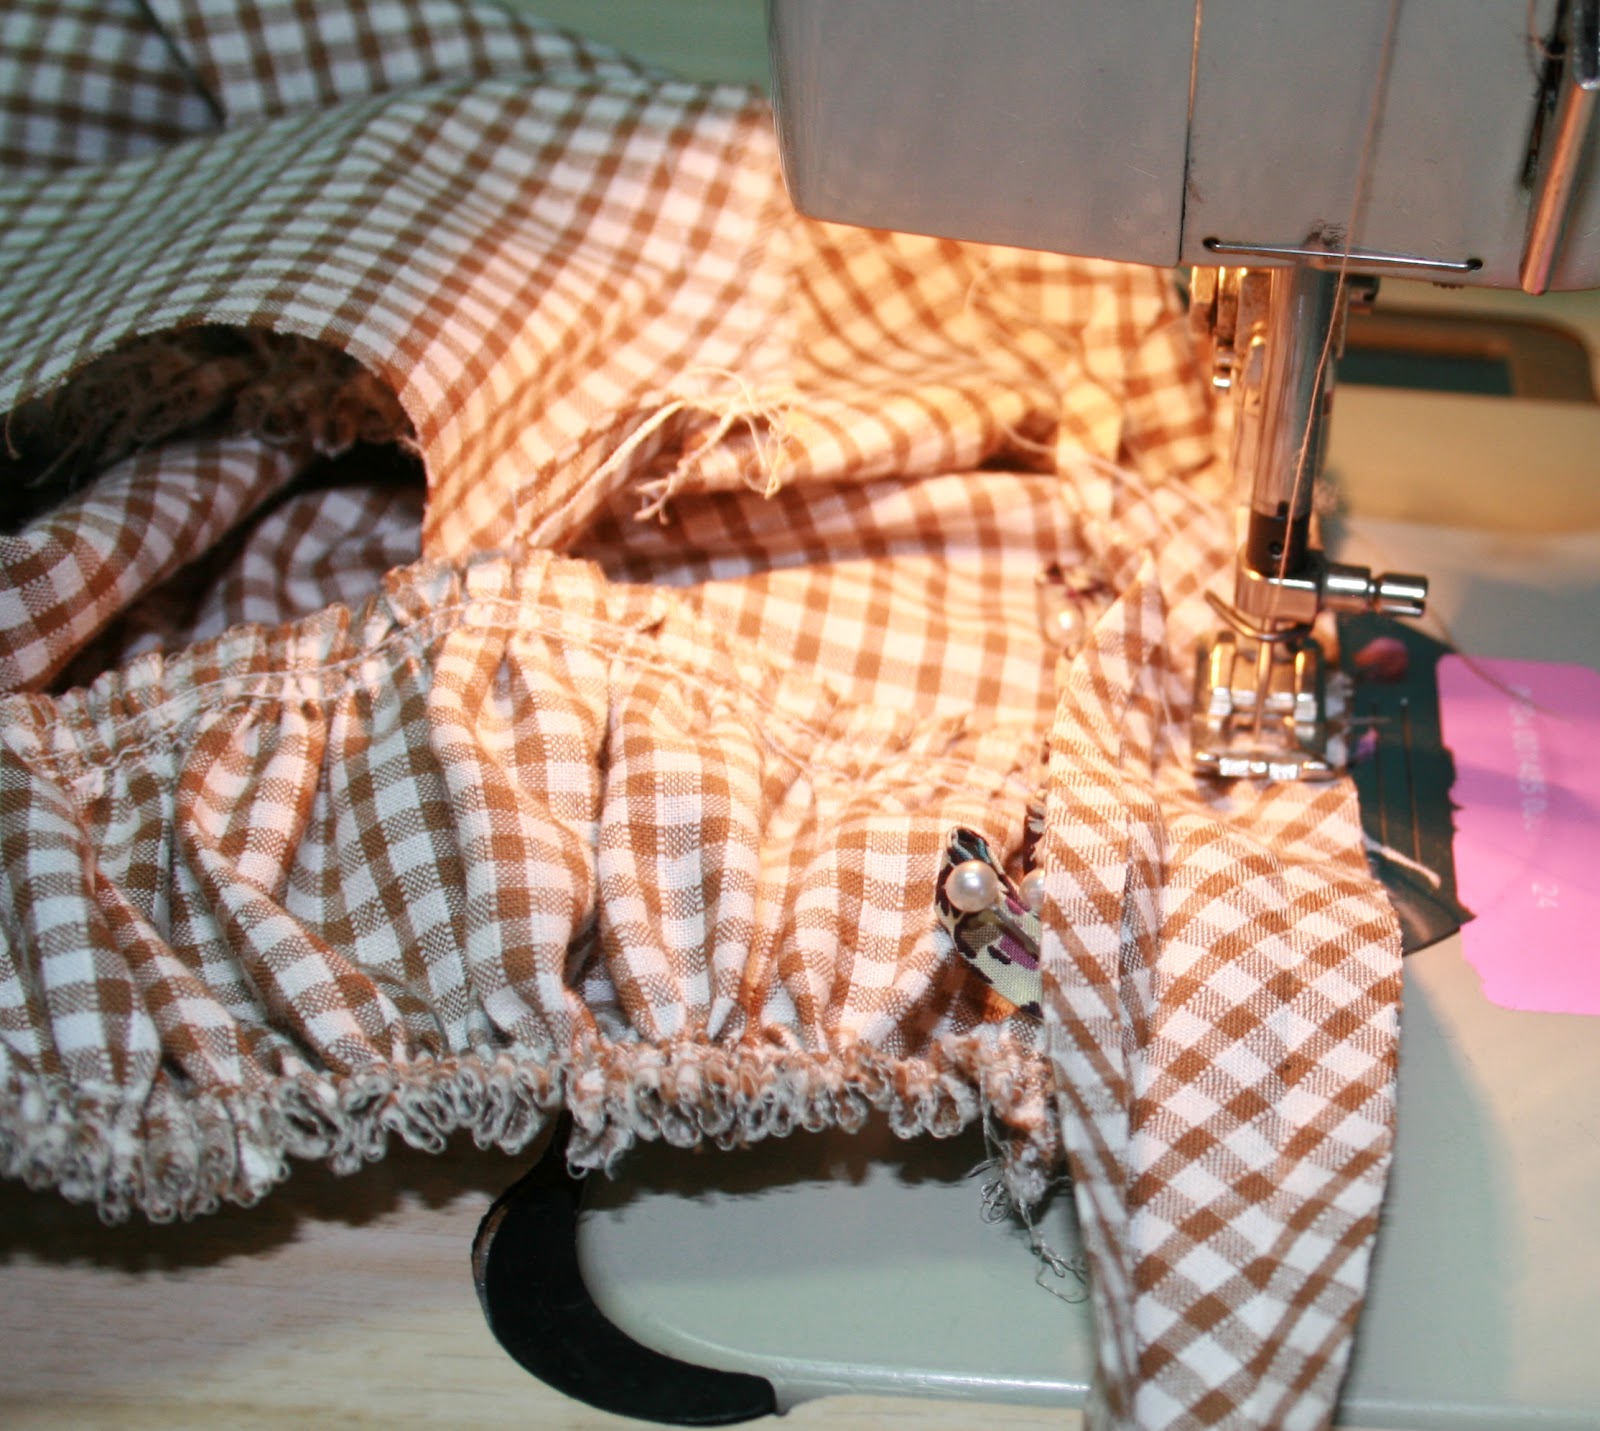
Neaten both raw edges of the bodice ruffle.

I would strongly recommend neatening the top of the dress now too!

Starting and stopping at the basted slit line sew two(or three)lines of gathering thread.
I did the top and the bottom edge at the same time.
For this medium cotton I only used two rows of gathering,the hanky linen version that I am currently working on I have used three.
I will let you know if it makes a difference!

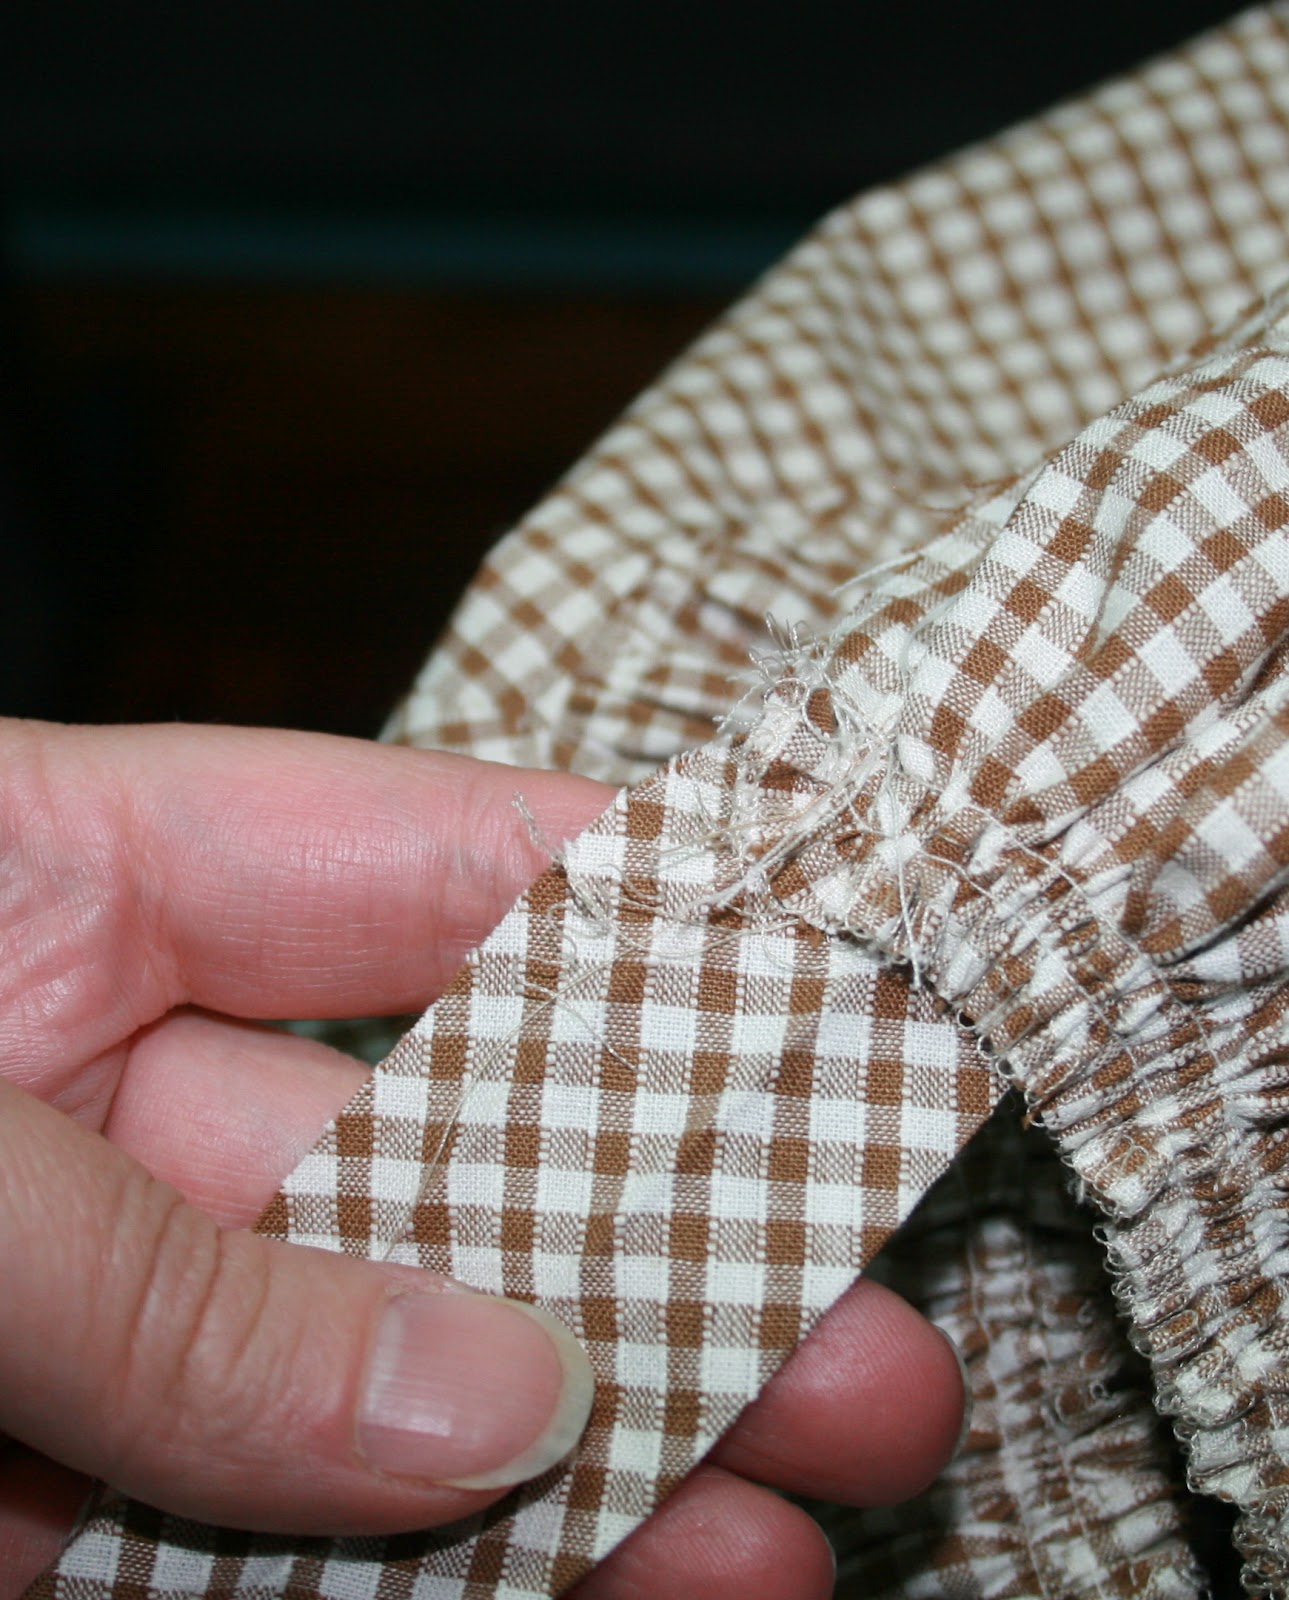
Pinning right sides together and matching the basted split line pin the gathered bodice ruffle to the dress.
Even out the gathers.
The pattern suggest to have fullness at the front and back and not so gathered at the sleeves.

When you are satisfied with the gathers baste in place.

Take care not to sew over the top gathering threads if you have pre-gathered that.

I found it helpful to stitch from the bodice side to help avoid tucks.
Check for tucks and then stitch as per normal.

Press the seam towards the dress.
I chose to topstitch from the right side.

Following the pattern instructions and using a tiny stitch length-sew either side of the basted slit line sloping to a 'V' at the bottom(the pattern instructions has a good diagram)

Cut along the basted slit line taking care not to nip through the tiny safety stitches that you have just sewn.
Mind the pre gathered threads as well!

You may choose to pull up the threads at the neckline now.
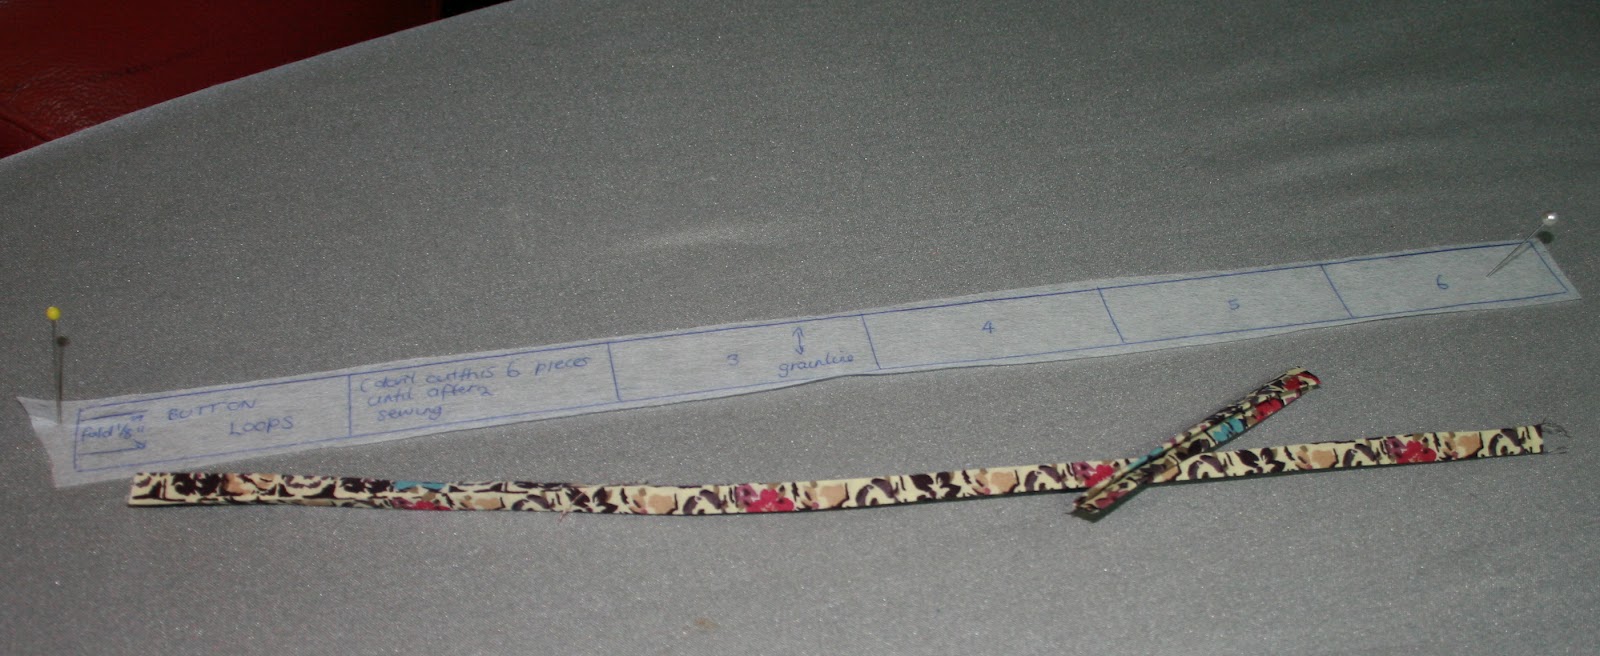
Prepare the button loops.
(I was working with scraps so I had to cut an extra loop)

When stitching the loop piece sew it over tissue paper,it will prevent your machine 'eating' it.

Tear it off gently after sewing.

Cut into six loops.

Prepare the neck slit binding.

I attached mine 'backwards'.
Pin the right side of the binding to the wrong side of the neck slit.

To get a nice finish at the bottom of the split I hand basted this bit.

Pin the loops in place so they will be sewn into the slit binding.
This tip came from Runcible Days,for more Village Frock tips see here.
Stitch the neck slit binding in place taking care not to hit the pins.

It should look like this on the inside-Tidy Heidi!
Just snip this extra bit off!

Wrap the neck slit binding around the seam and pin it in place.
It may be helpful to pin the button loops in place-just while topstitching.

Nice and neat and very sturdy!

Topstitch along the edge of the neck slit binding.

There we go!

The inside view.

Prepare the neck binding.
I shortened mine by a good 3/4 inch(a tip from Mel)
Next time I will shorten it a little more....another 1/2 inch?

Folding under the ends neatly pin in place to the wrong side of the bodice neck.

Trim the seam just a tad!

Fold the binding over and pin in place from the right side.
Use lots of pins!

Sew in place.
I suggest sewing it 'inside the tunnel'

Ta-dah!

Nearly there!

Gather up the arm ruffles and pin to the sleeve end.
Sew and neaten and press the seam.
I chose to topstitch.

Sew the side seams.
I strongly suggest clipping the curves before neatening.

I finished the seams but was not happy with the sit of the underarm seam so I clipped after overlocking and then stitched a large zigzag to stop fraying.

Clipping improves the side seam finish.

Pre fold and press the sleeve band.
Let the band cool and set,then open it and sew the short ends together to create a loop.
Repress.

Gather the sleeve ruffles to fit the sleeve bands.

Pin the sleeve bands to the wrong side of the sleeve ruffles-adjust the gathers to fit.
Sew using the fold line as a sewing guide.

Wrap the sleeve binding around the seam and pin in place.

Topstitch.
Consider sewing on the inside of the 'tunnel'.

Sew the buttons in place.

One Village Frock.
A little bit of Runcible,a little bit of Mel,a little bit of Five&Counting and a whole lot of Sugar City.
Does it live up to all the hype?
YES!
See for yourself......


Bye Bye
x Tildy
I love it, Nicole! And I'll be using your tutorial when I make it again...
ReplyDeleteWonderful!!I love everything about this dress! Now just to find a pattern somewhere :) .....
ReplyDeleteTalk abut coincidence. I'm just attempting to make this dress right now!
ReplyDeleteI don't have this pattern but I sure want it in the worst way! So I've drafted my own pattern based on images seen on various blogs. I think I have the dress front and back pattern made correctly but the sleeve shape eludes me. Could you in your sweet kindness take a photo of that pattern piece and e-mail to me please, pretty please, with sugar and honey on top?
On my neck piece, I didn't taper it, but from your photo I can see it needs tapering.
I've made one muslin from my draft and it truly needs more tweaking.
As for the gathering threads on the hanky linen one you mentioned, I find that 3 rows of gathering always gives more control. Lots of unpicking afterwards, but much more even in the end.
The dress you made for Tildy is fantastic.
I'm green with envy.
Thank you Deb,I am sorry,I don't think I am meant to...
DeleteNo hard feeling ?
x N
Ah, so sweet!
ReplyDeleteI have this pattern and I've been wanting to do this up in a lush silk velvet but I can't find the right weight of fabric. I'd better hurry and just find *something* to make it up in since my one and only is already at the top of the sizing. It's cute in gingham.
Fantastic! I'll be revisiting this for sure when I attempt my own knock-off, yes indeed!
ReplyDeleteGorgeous Nicole! Thanks for the 'how I made it' - I always like to look at pics when I'm sewing
ReplyDeleteDivine. And that Tildy, complete sweetness.
ReplyDeleteSuch a fantastic frock! You did a beautiful job..and Tildy is so sweet!
ReplyDeleteYour daughter is just stunning. The dress is very sweet too!
ReplyDeleteI am very seldom jealous of things that other people have, but I must admit that I am quite jealous of you for having this pattern!! The dress is gorgeous. Love, love the fabric you chose for the trim and button loops.
ReplyDeleteLots of Sugar Love!
ReplyDeleteIt turned out quite wearable for a first go-Tildy loves it! I do like how the linen is sewing up.
x N
Quite beautiful...using the liberty trim is sheer cleverness! Such a shame that the pattern is no longer available.
ReplyDeletei love the gigham and liberty combo. i need to make up another version of this dress soon.
ReplyDeleteTildy looks scrumptious in her beautiful frock! Sadly, I missed this pattern during its brief availability. Now Greer is too big, but I think the style would make a fabulous top for an older girl. I can envision you making one in silk!
ReplyDeleteThank you girls!
ReplyDeleteI must get the courage up to sew the silk.
x N
oh.my.goodness. could not be any sweeter.
ReplyDeleteThank you Rachel.
ReplyDeleteI am sewing two more at the moment,its a little time consuming but lots of fun to make.
x N